Linux System Administration Essentials (Part 2): Disk Partitioning, User Management and Network Configuration
In this part, we dive into partitioning and setting up the file system. You’ll also learn how to effectively manage users and groups, configure network settings and troubleshoot network issues.
Introduction
In the first part of this series, we covered foundational Linux concepts, including the OS, kernel and file systems. If you haven’t checked that out yet, you can read it here. In this part, we’ll dive deeper into three essential system administration tasks:
- Setting up disk partitions and file systems
- Managing users and groups
- Configuring and troubleshooting network settings
Let’s explore each of these in detail!
Setting Up Disk Partitions and File Systems
Before creating partitions, let’s understand what partitioning is and why it’s important.
Partitioning is the process of logically dividing a hard drive (or SSD) into separate sections, called “partitions”. Each partition can function as an independent drive, which helps us organize data, install multiple operating systems or keep certain types of files separately.
Reasons to Partition a Disk:
- Organization: Separating system files, user data and backups.
- Multiple OS Support: Install different operating systems (e.g. Windows and Linux) on the same disk.
- Performance: Some workloads benefit from dedicated partitions.
- Security: Certain partitions can be restricted to enhance security.
Types of Partitions:
- Primary Partitions: Up to four primary partitions can be created on a disk.
- Extended Partitions: To create more than four partitions, an extended partition can be created to hold multiple logical partitions.
- Logical Partitions: These reside within an extended partition, allowing more than four partitions on a disk.
Why Only Four Primary Partitions?
The MBR(Master Boot Record) is stored on the disk’s first sector. Each sector of hard drive is of standard size 512 bytes so size of MBR is 512 bytes as well. In MBR, the first 446 bytes contains boot code then 64 bytes contain partition table and remaining 2 bytes contain boot signature. Each entry of the partition takes 16 bytes that’s why you can only create 4 primary partitions(64 / 16 = 4).
For more than 4 partitions, we use extended partitions with logical partitions. In extended partition there is again first sector of 512 bytes which contains EBR (Extended Boot Record) but this doesnt contain boot code so 446 is free then there is again 64 bytes partition table like MBR but it only uses 32 bytes leaving 32 bytes unused. In that first 16 bytes describe the first logical drive and the remaining 16 bytes are pointer to next logical drive. Similarly, this chain continues.
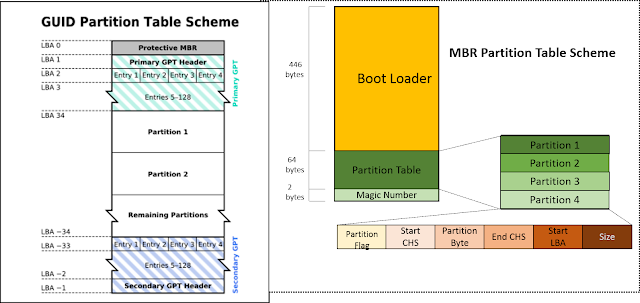
Layout in MBR vs GPT from simplylinuxfaq
Newer systems now use the GUID Partition Table (GPT), which supports a much higher number of partitions.
Each partition can be formatted with a file system, which determines how data is stored and retrieved. Common Linux file systems include:
- ext4: Default for many Linux distributions, supports large files and journaling.
- xfs: Good for high-performance tasks.
- btrfs: Offers advanced features like snapshots and dynamic resizing.
Creating Partitions:
To set up a partition and file system, follow these steps:
- Open a terminal and list disks with:
1
sudo fdisk -l
Alternatively, you can also see this using the GUI Disk Utility.

List Disks
- Use
fdiskto create a partition:1
sudo fdisk /dev/sdX (replace X with your drive letter)
- Type
nto create a new partition. - Choose
pfor primary orlfor logical. - Set the partition number and size.
- Type
wto write changes.
- Type
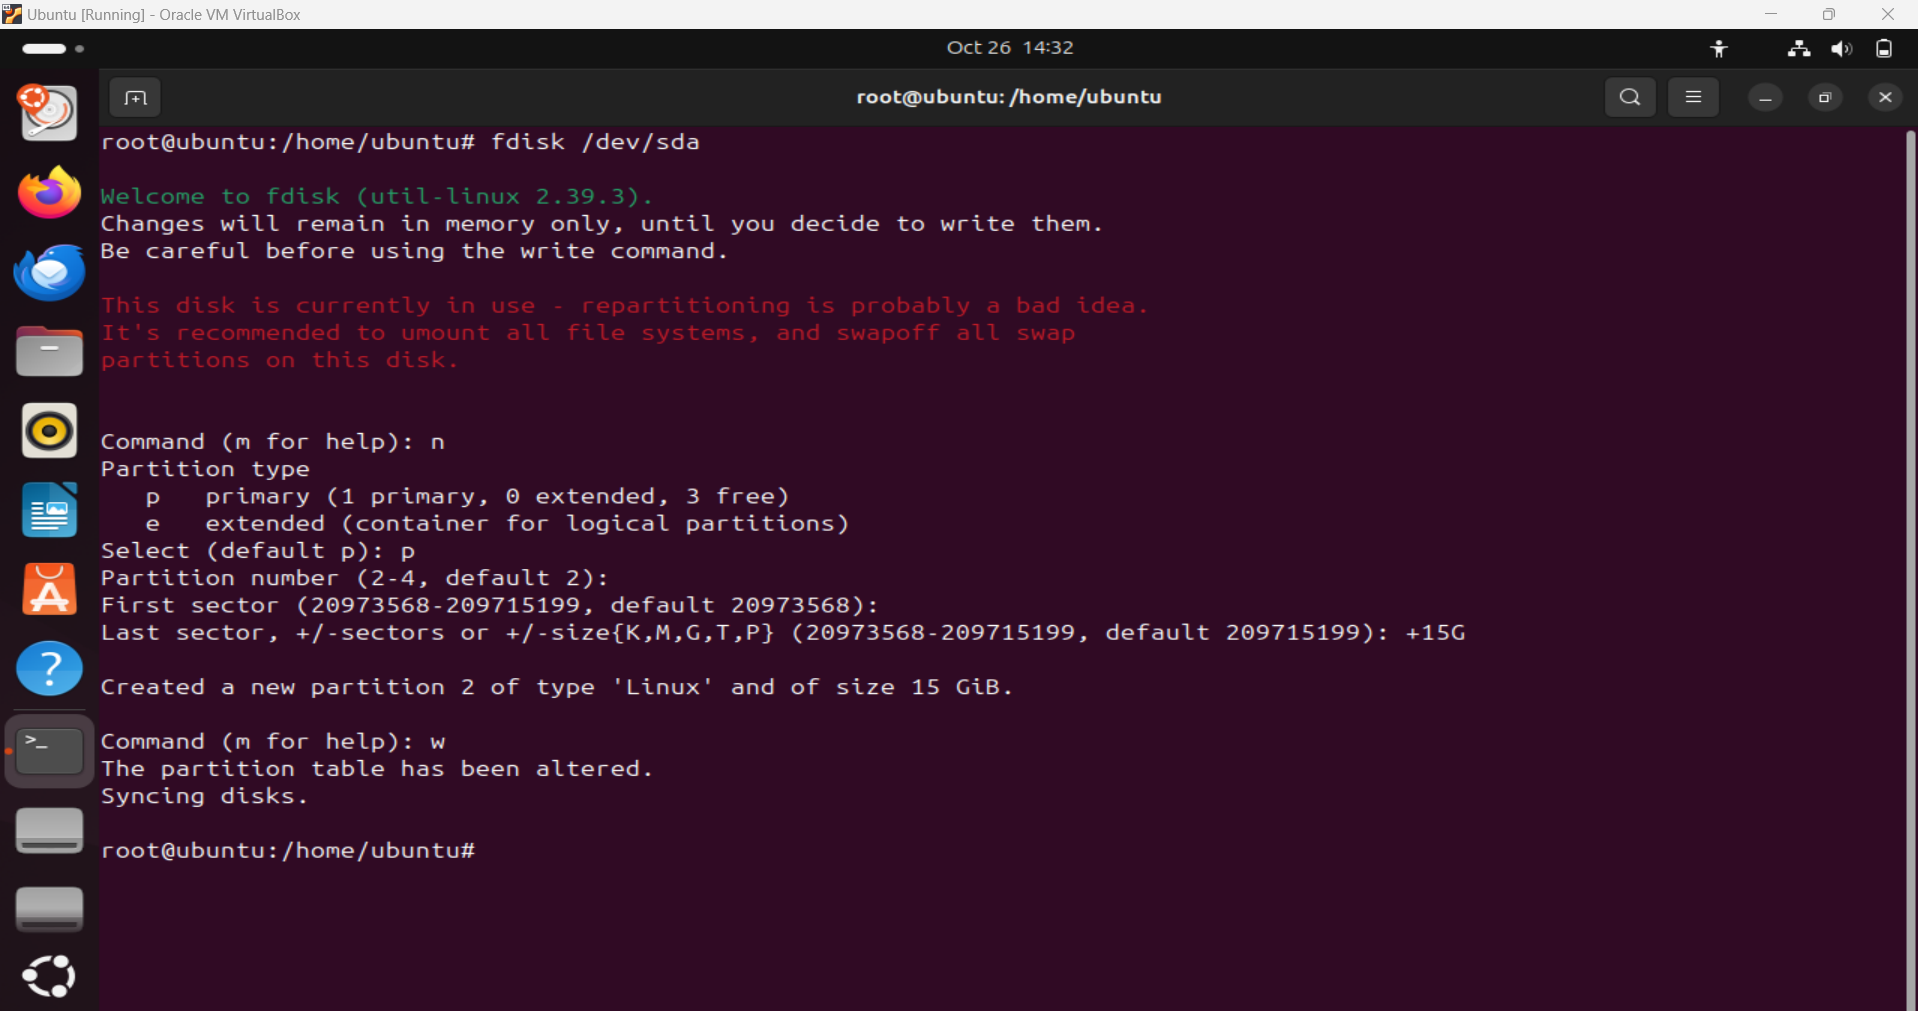
Creating Partition
- Reboot to apply changes. Then format the partition:
1
sudo mkfs.ext4 /dev/sdX (replace X with your drive letter)
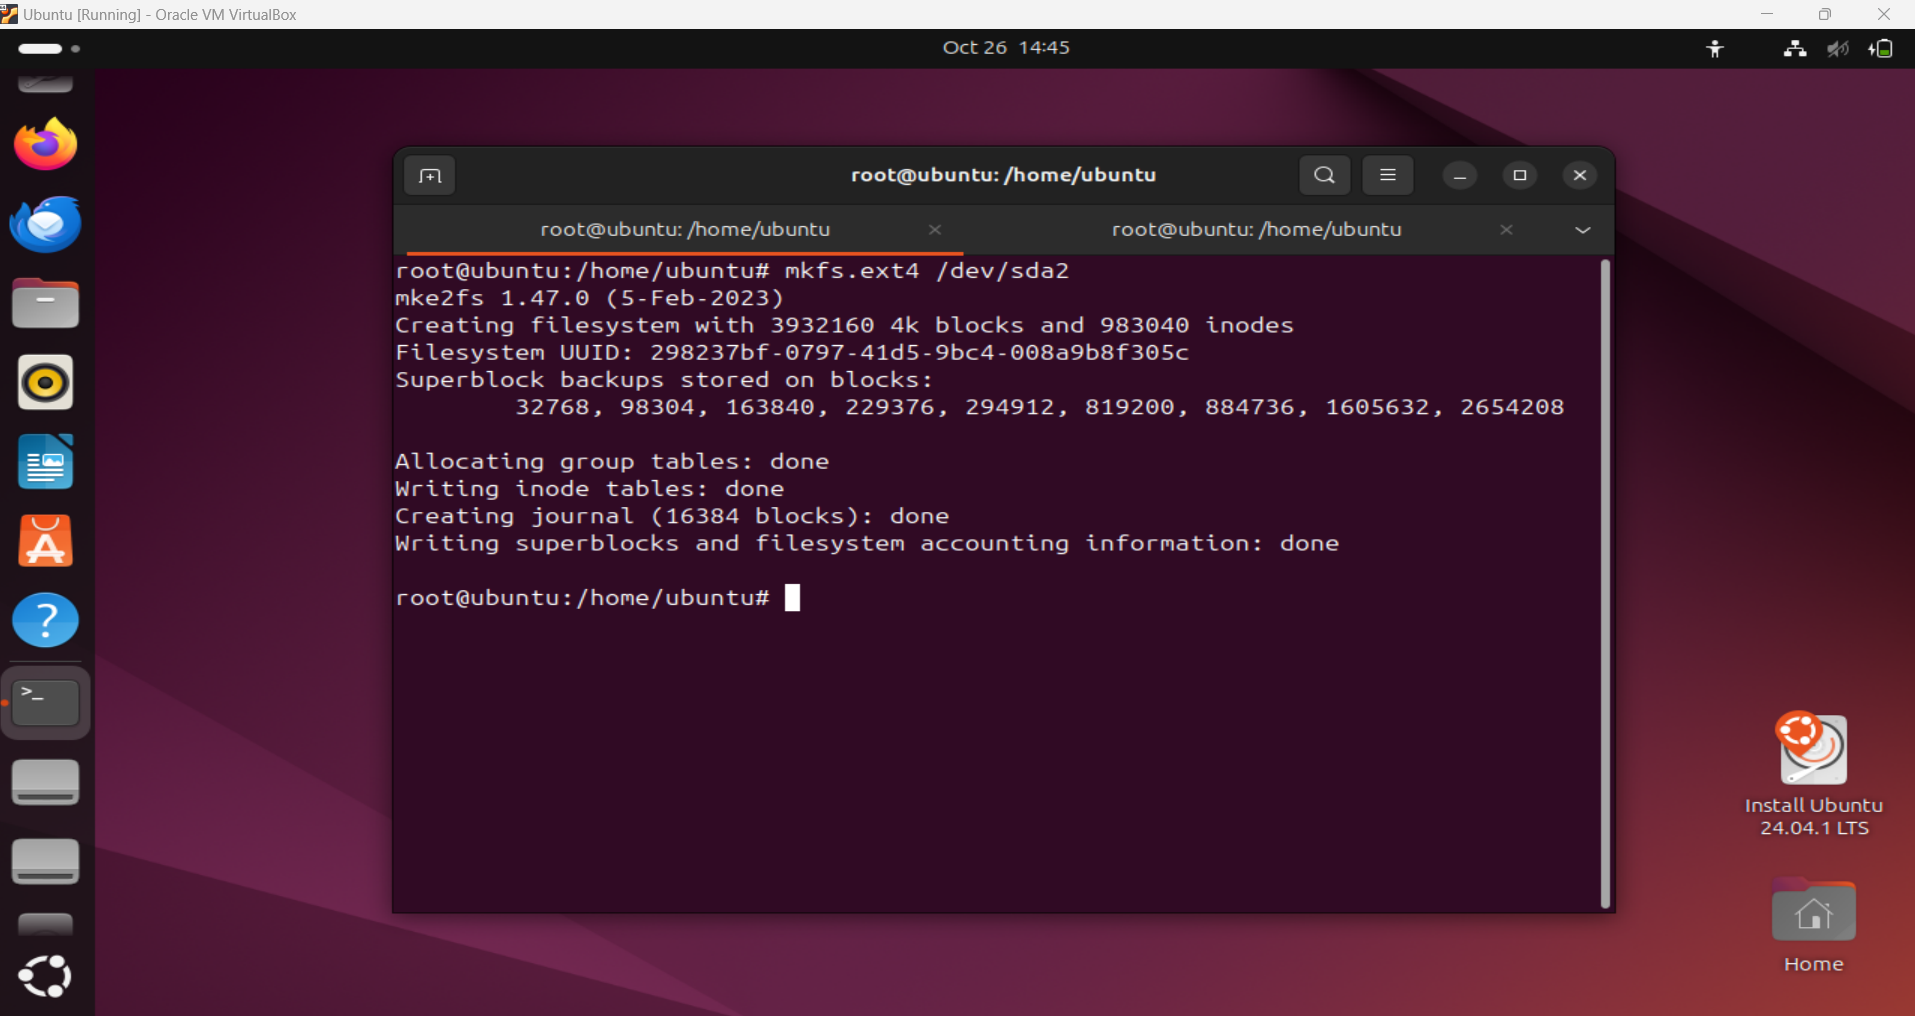
Formatting with Filesystem
- To make the partition persistent, add it to
/etc/fstab: The format to add entry in /etc/fstab is:1
UUID=[UUID] /mountpoint ext4 defaults 0 0
You can get the UUID with
blkidcommand.
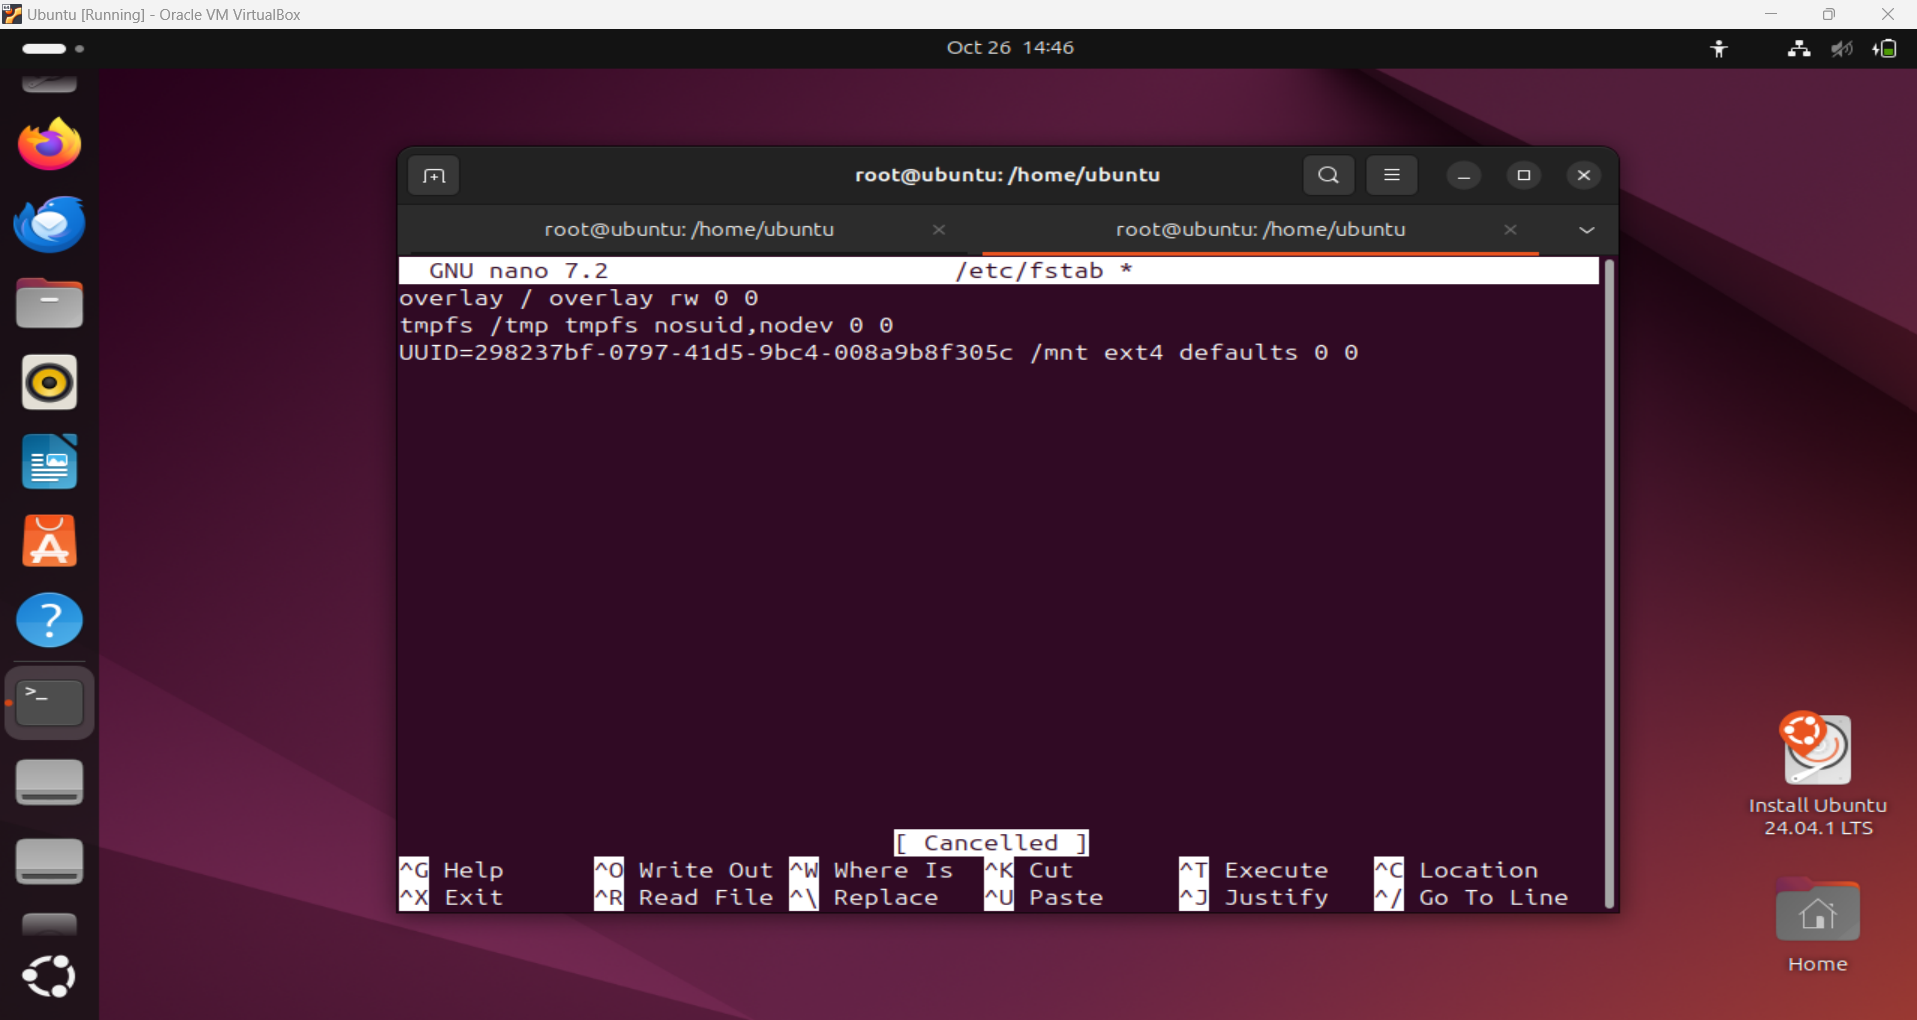
Adding entry to /etc/fstab
You can learn more about /etc/fstab file in detail from this article : https://linuxconfig.org/how-fstab-works-introduction-to-the-etc-fstab-file-on-linux
- Finally, mount the partition:
1
2
sudo mount /dev/sdXn /mnt
# sudo mount /dev/sda1 /mnt (example)
Partitioning is a fundamental skill for efficient storage management in Linux. With these commands and concepts, you’re well-equipped to manage partitions effectively.
Managing Users and Groups on a Linux System
Managing users and groups is essential in Linux administration, allowing control over system access and permissions. Here’s a comprehensive overview, from the fundamentals to more advanced concepts.
1. Basic Concepts
- Users: A user is an individual account that can log into the system. Each user has a unique username and associated permissions.
- Root User: The superuser (root) has unrestricted access to all commands and files on the system. It’s used for administrative tasks.
- Groups: Collections of users with similar access needs. Groups simplify permission management across multiple users.
2. User and Group Management Commands
User Management:
- Adding a User:
1
sudo adduser username
This creates a new user and prompts you to set a password and other details.
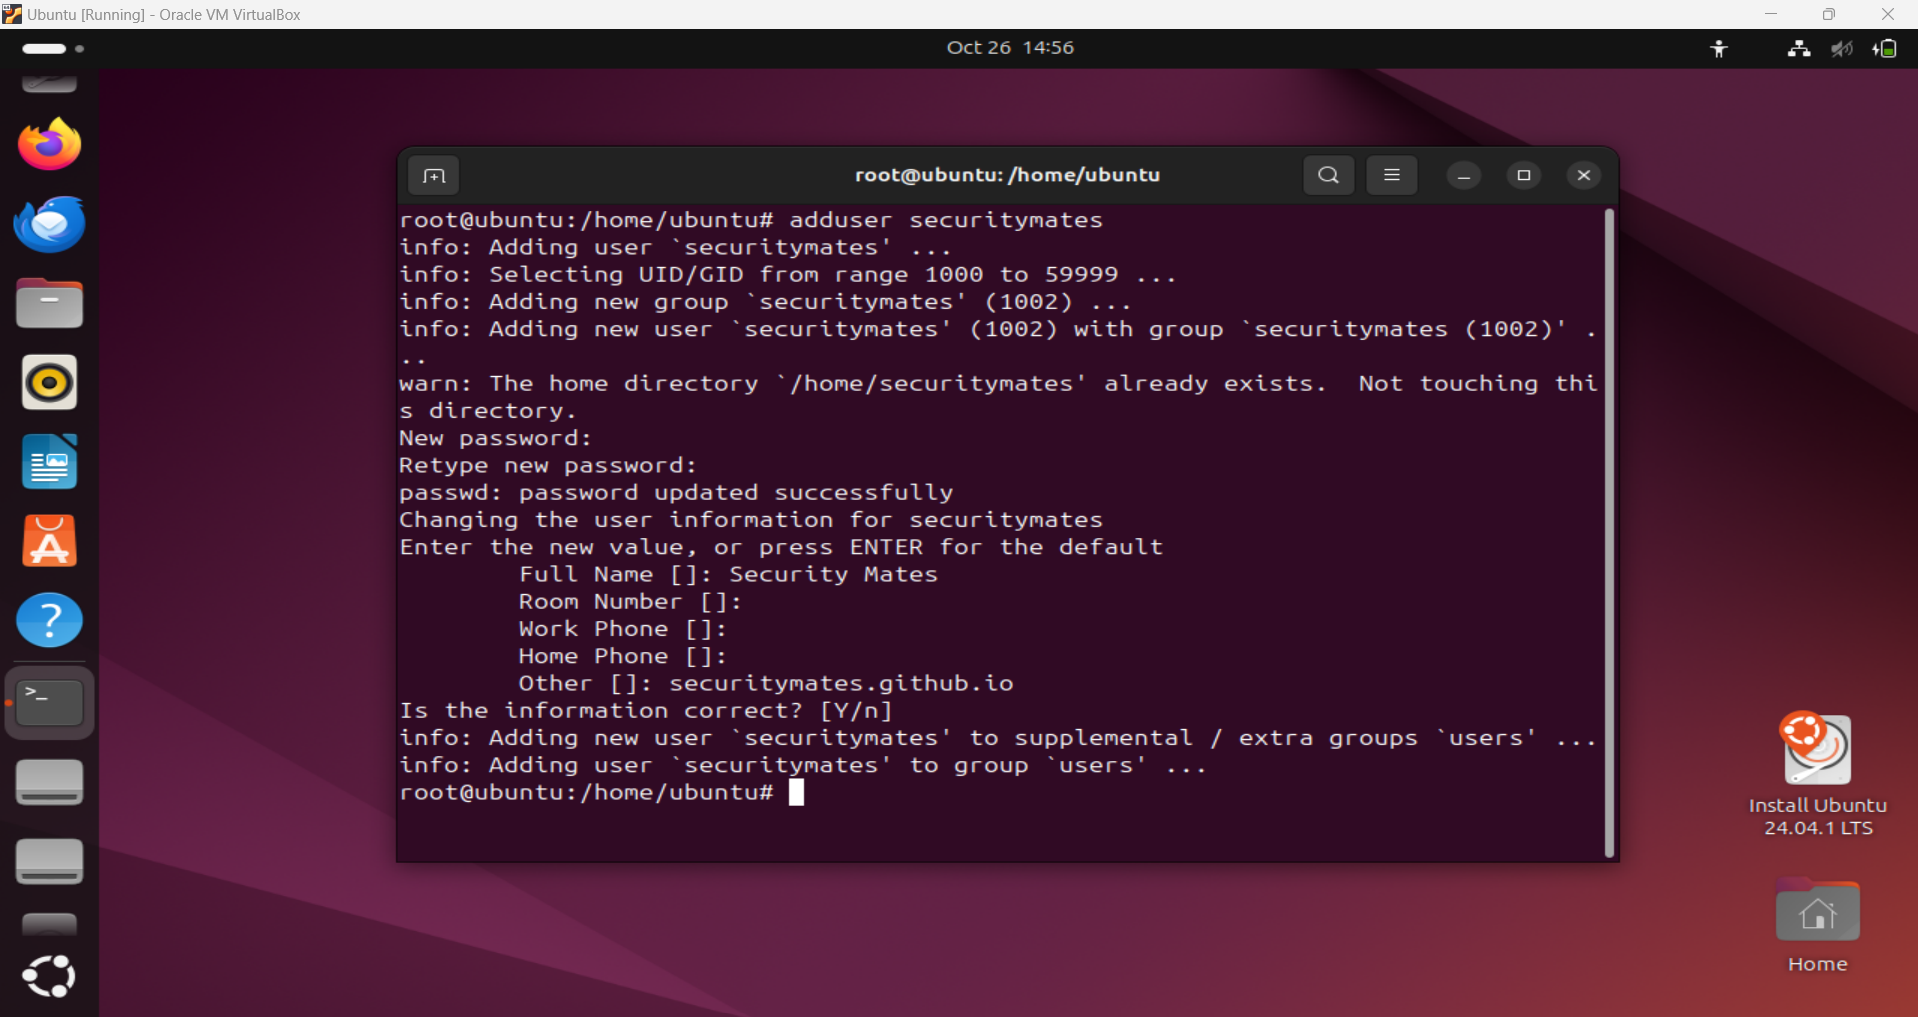
Adding user ‘securitymates’
- Deleting a User:
1
sudo deluser username
This removes the user account.

Deleting user ‘securitymates’
- Modifying a User:
1
sudo usermod -aG groupname username
This command adds a user to a group (
-aGmeans append to groups). - Viewing User Information:
1
id username
This shows the user’s UID (user ID), GID (group ID), and group memberships.
Group Management:
- Adding a Group:
1
sudo addgroup groupname
This creates a new group.
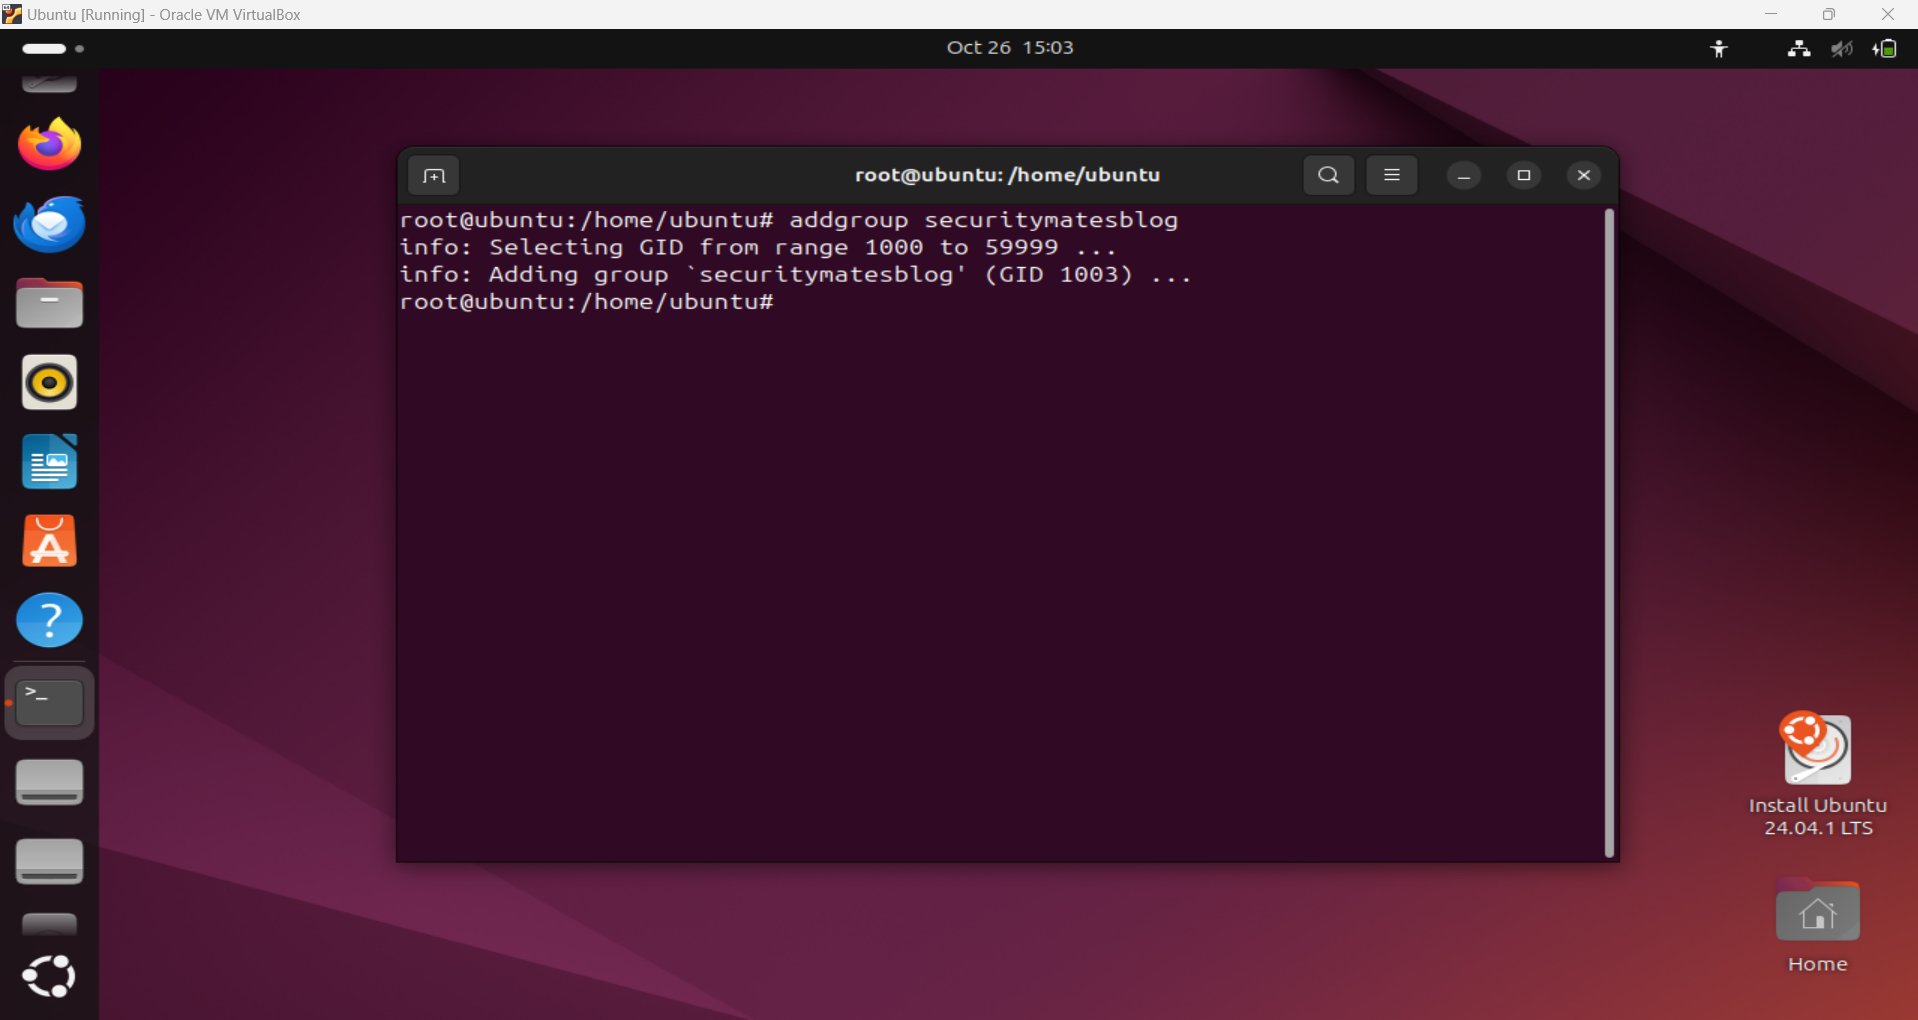
Creating new group ‘securitymatesblog’
- Deleting a Group:
1
sudo delgroup groupname
This removes the group.
- Modifying a Group:
1
sudo groupmod -n newgroupname oldgroupname
This changes the name of an existing group.
- Viewing Group Information:
1
getent group groupname
This displays information about the specified group.
3. Understanding /etc/passwd and /etc/group Files
- /etc/passwd: This file contains information about user accounts. Each line corresponds to a user and includes fields like:
- Username
- Password (usually an ‘x’ indicating the password is stored in /etc/shadow)
- User ID (UID)
- Group ID (GID)
- User info (e.g., full name)
- Home directory
- Default shell
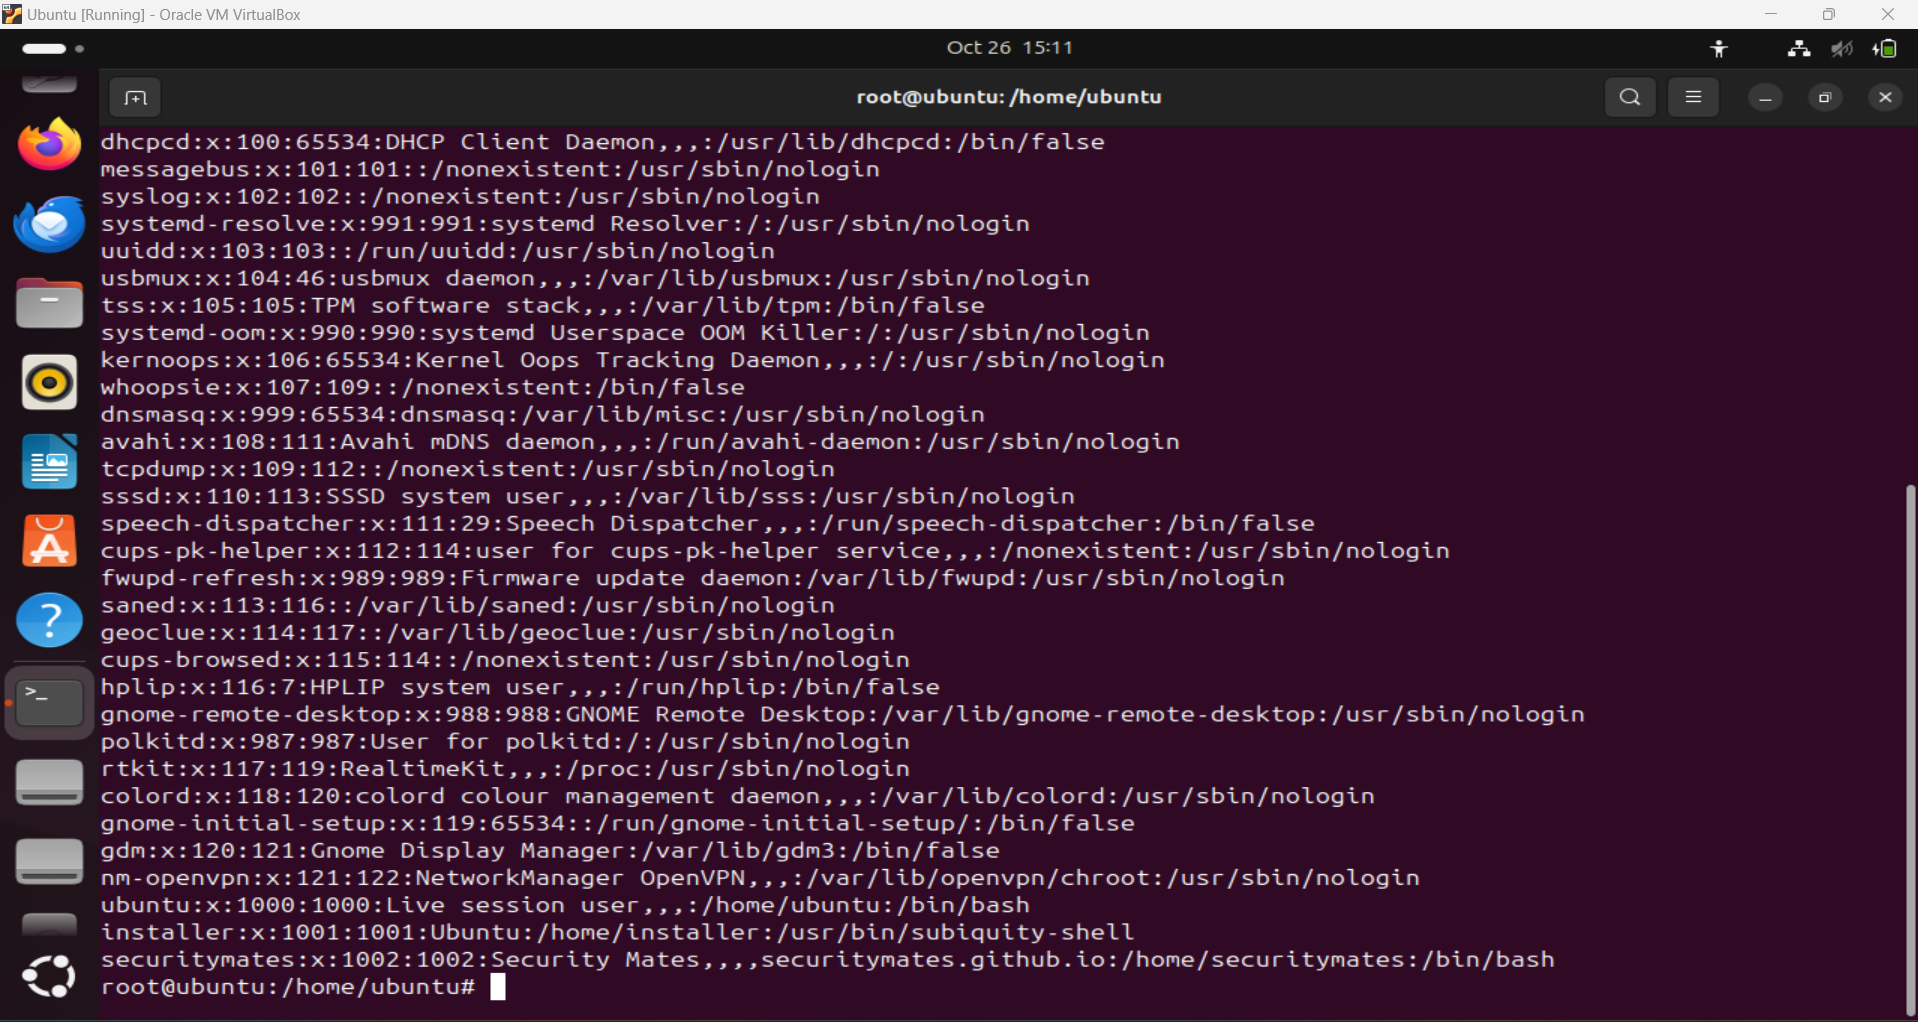
/etc/passwd file
- /etc/group: This file contains information about groups. Each line includes:
- Group name
- Password (usually not used)
- GID
- List of users in the group
4. Advanced User and Group Management
Password Management
- Changing a User’s Password:
1
sudo passwd username
This prompts you to enter a new password for the user.
- Password Aging: You can set password aging policies using
chageto control when users must change their passwords and how long they’re valid.
Access Control Lists (ACLs)
- Definition: ACLs allow for more granular permission settings than traditional Unix permissions.
- Setting an ACL:
1
setfacl -m u:username:rwx /path/to/file
This grants the specified user read, write, and execute permissions on a file.
- Viewing ACLs:
1
getfacl /path/to/file
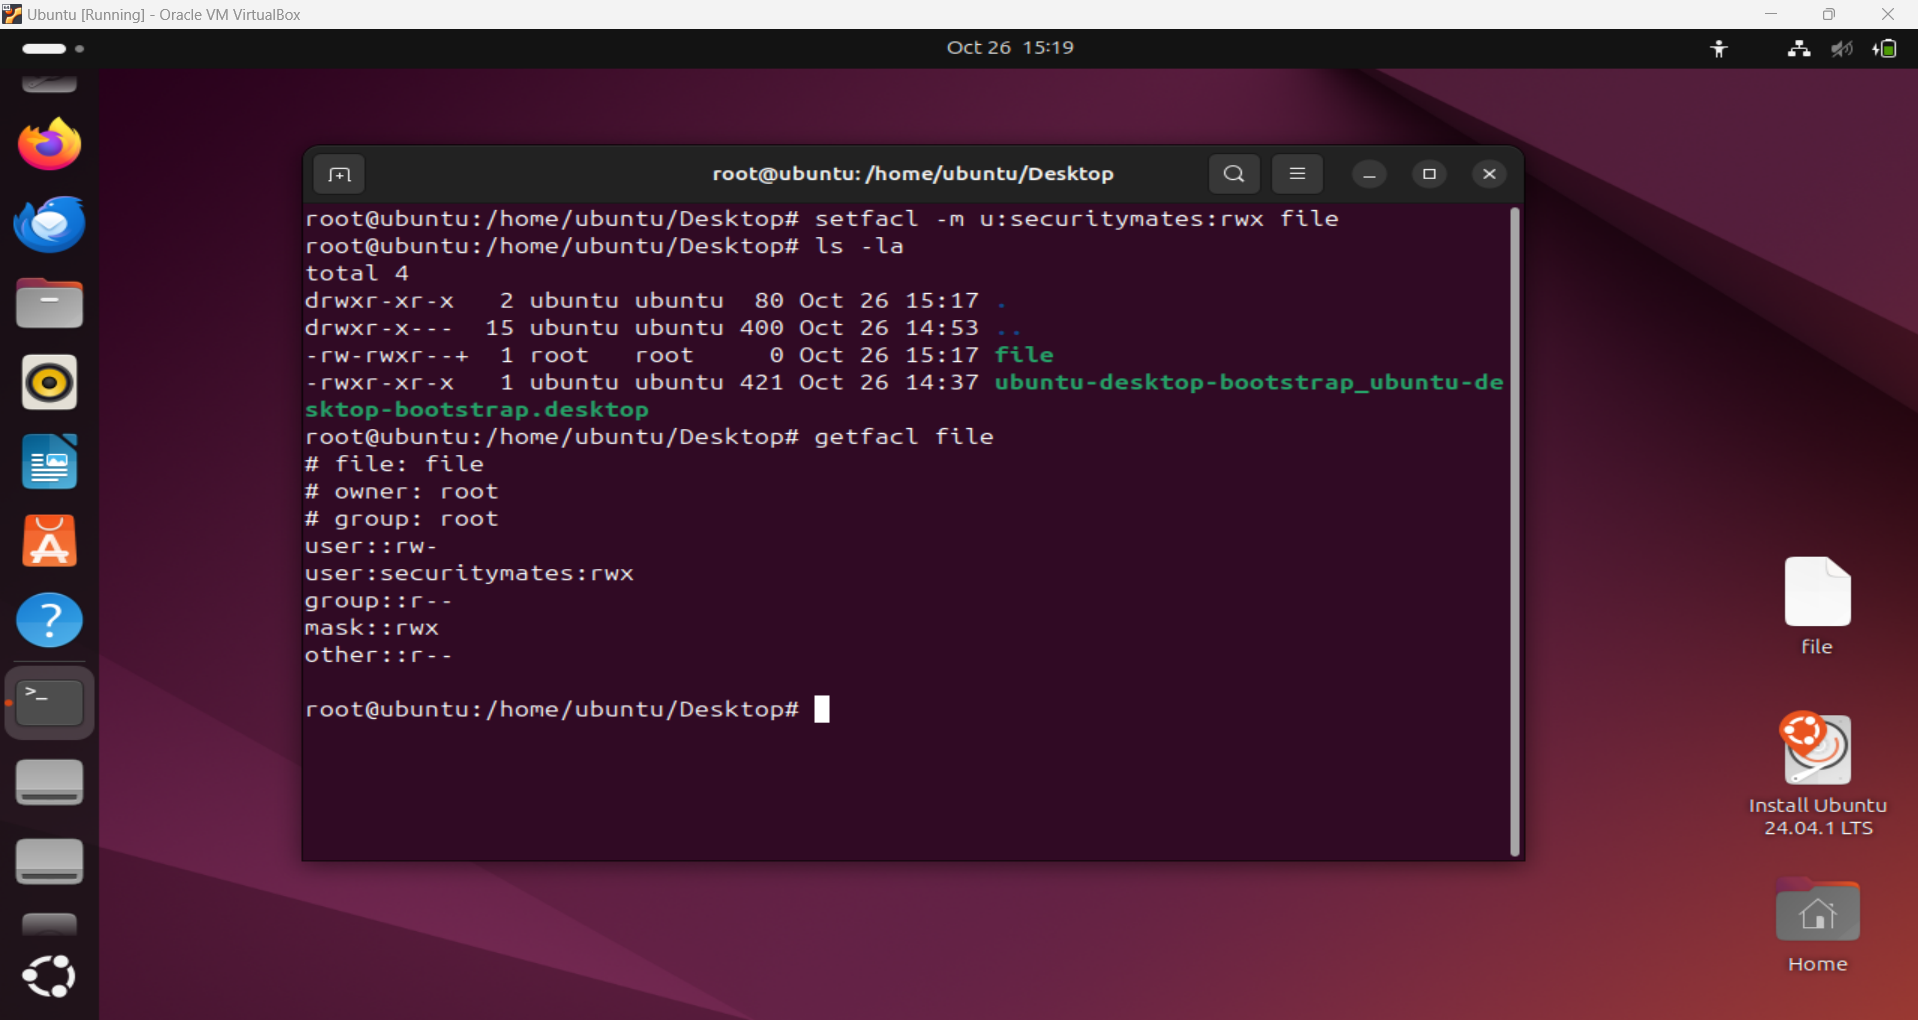
Setting ACLs
Managing System Users
- System Users: These are users that are created for specific services or applications (e.g.,
www-datafor web servers). They typically have no login privileges. - Creating System Users:
1
sudo adduser --system --no-create-home username
By understanding and using these commands, user and group management on Linux becomes more secure and efficient.
Network Configuration and Troubleshooting
Configuring Network Interfaces
Ubuntu uses netplan for network configuration. The configuration file is typically located at /etc/netplan/01-netcfg.yaml.
Example Netplan Configuration
Edit the netplan config file:
1
2
3
4
5
6
7
8
9
10
11
12
network:
  version: 2
  ethernets:
    eth0:
      dhcp4: no
      addresses:
        - 192.168.1.100/24
      gateway4: 192.168.1.1
      nameservers:
        addresses:
          - 8.8.8.8
          - 8.8.4.4
Apply the changes:
1
sudo netplan apply
Testing Network Connectivity
Use the following commands to troubleshoot network connectivity:
- Ping: Checks connectivity to a host.
1
ping -c 4 google.com - Traceroute: Diagnoses routing issues.
1
traceroute google.com
- Checking Open Ports: Use
ssornetstatto display open ports:1
sudo ss -tuln
- Viewing Network Configuration: Use
ipto view network details:1 2
ip addr show ip route show
Firewall Configuration with UFW
Ubuntu uses UFW (Uncomplicated Firewall) to manage firewall rules.
Basic UFW Commands
- Enable UFW:
1
sudo ufw enable
- Allow SSH connections:
1
sudo ufw allow ssh - Check firewall status:
1
sudo ufw status
DNS Troubleshooting
- Check DNS Resolution:
1
nslookup google.com
- Flush DNS Cache:
1
sudo systemd-resolve --flush-caches
Final Thoughts
Disk partitioning, user management and network configuration are foundational Linux administration skills. By mastering these areas you’ll be prepared to handle essential tasks in managing Linux systems effectively and securely.
If you have any specific questions or need more details on any part, feel free to ask! Stay tuned for the next part of this series!